Creators on Curios have complete control over the pricing of their work at all times.
In addition we have made it easy to create a sale by changing pricing during a set time period. This works for all content types. We will be using a book for this example.
There are three basic steps to do this once you are in the item's settings in the Studio. For this example, we're going to have a book that is normally $10, set it to go on sale for $1 for Valentines day and then revert back to $10.
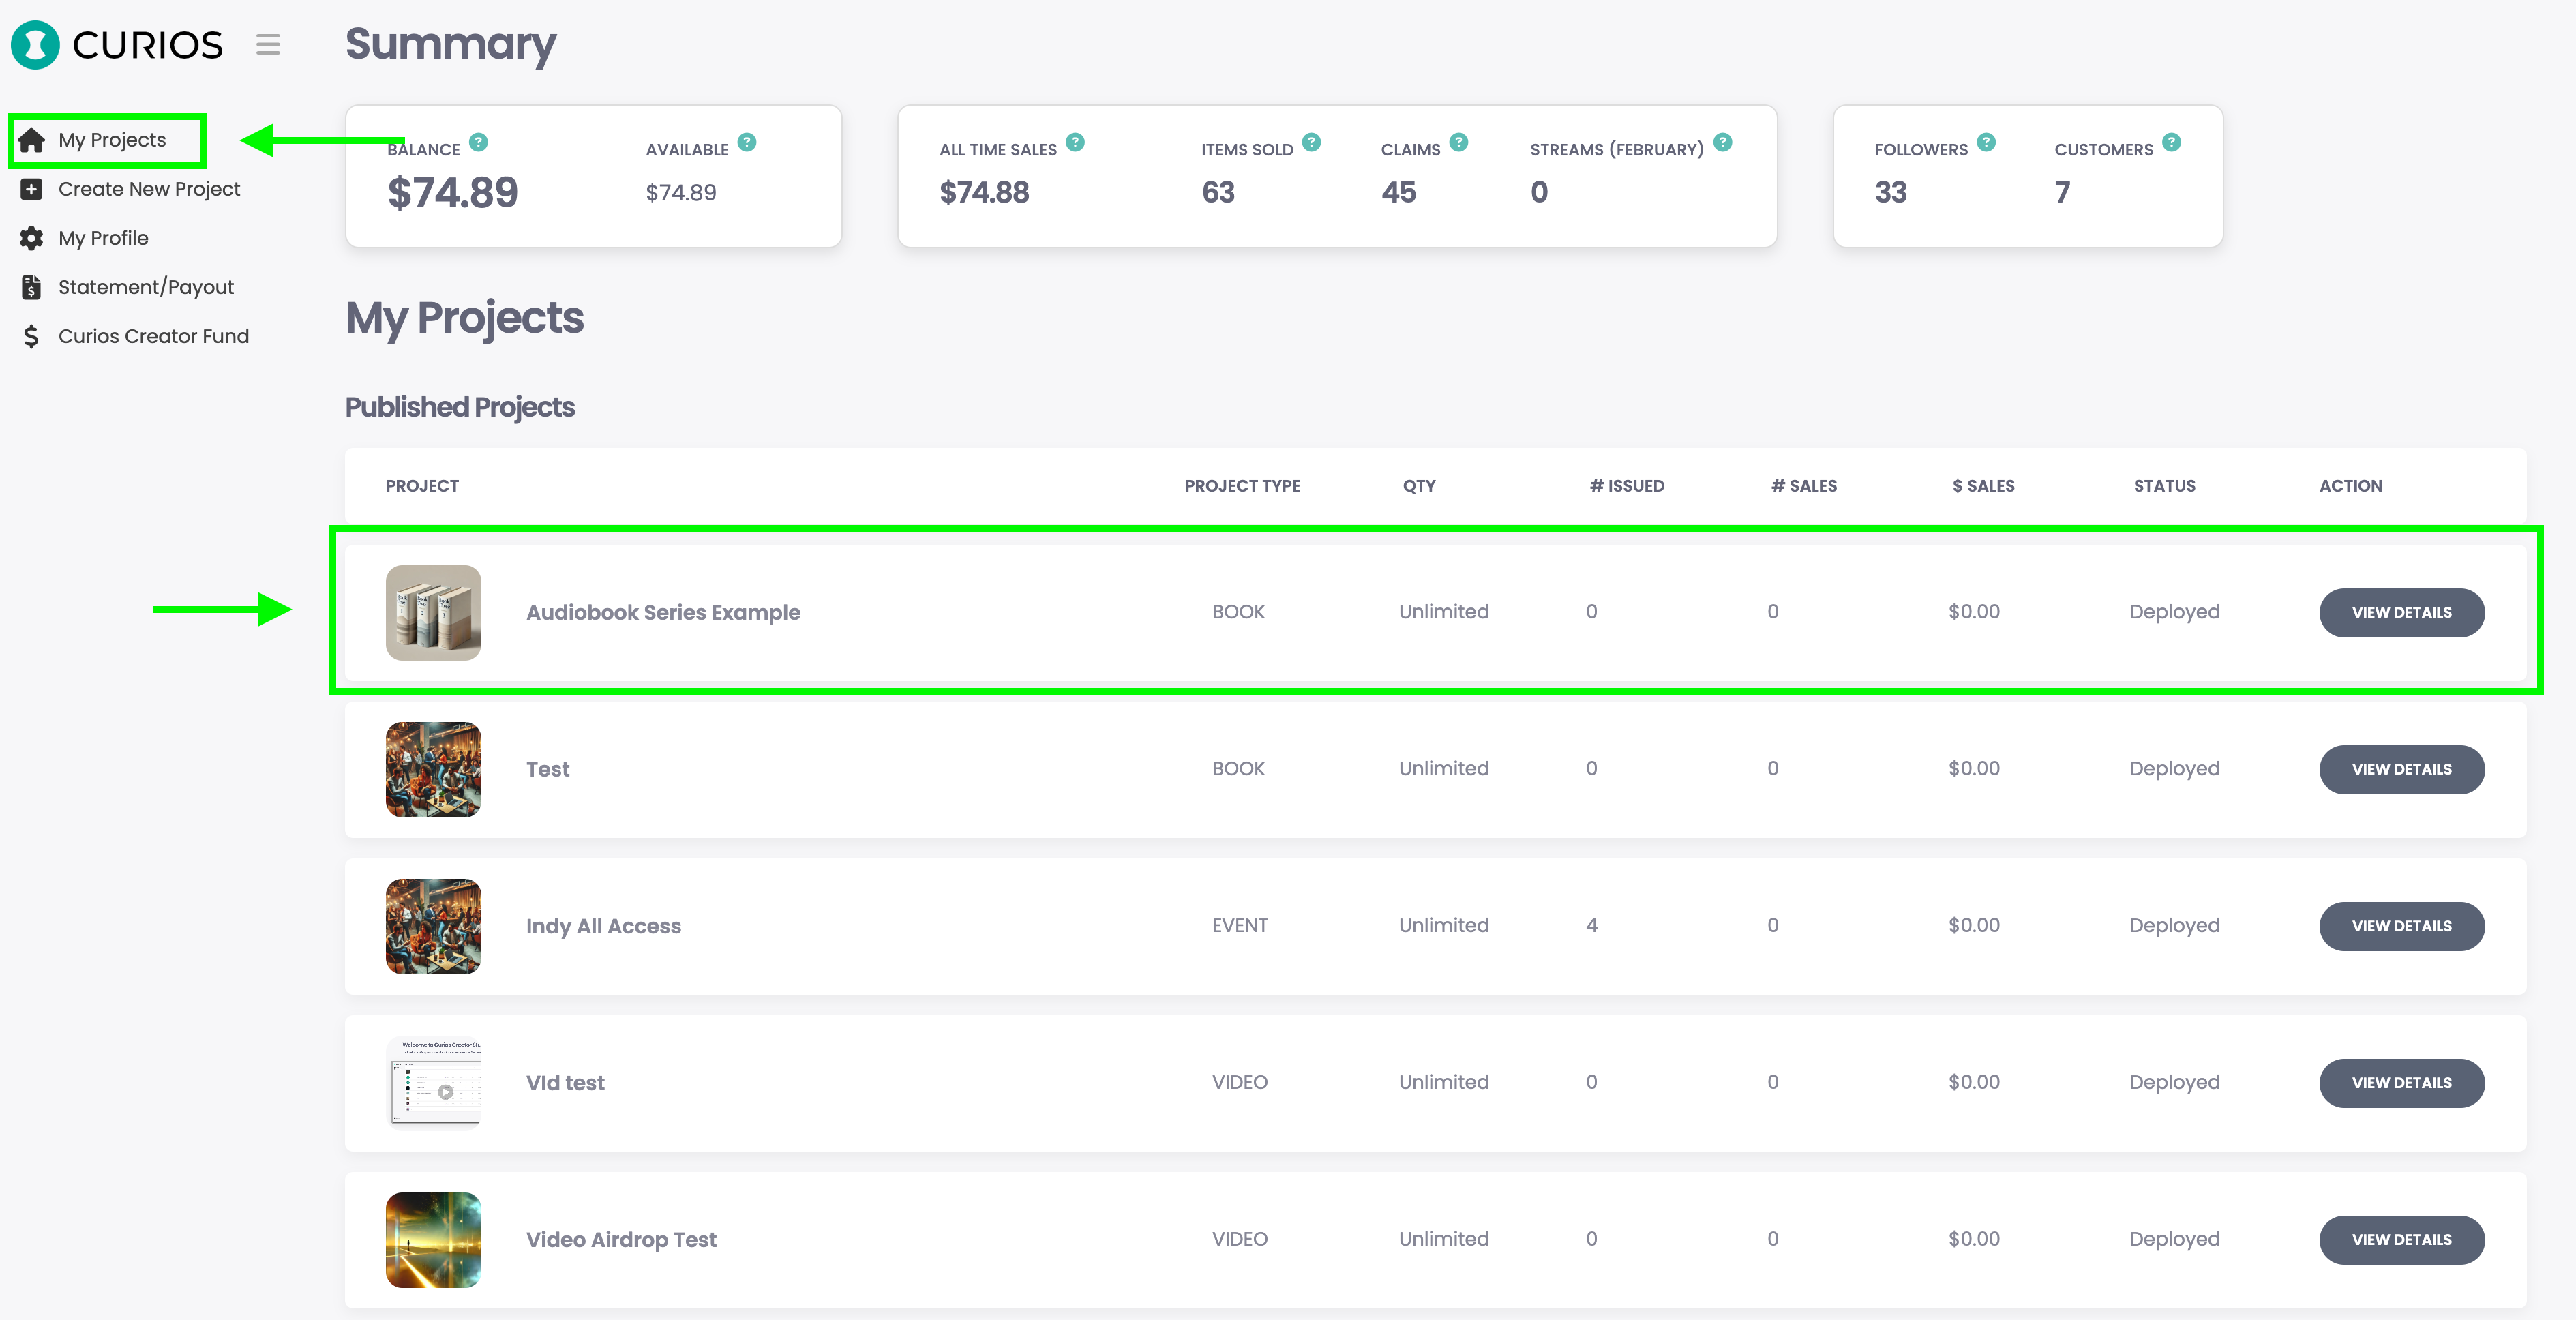
Log in to Studio.Curios.com and click on the project you would like to change pricing for.
If you have multiple items in your series, select the item which you want to set pricing. If you only have one item in your project, it should automatically be open.
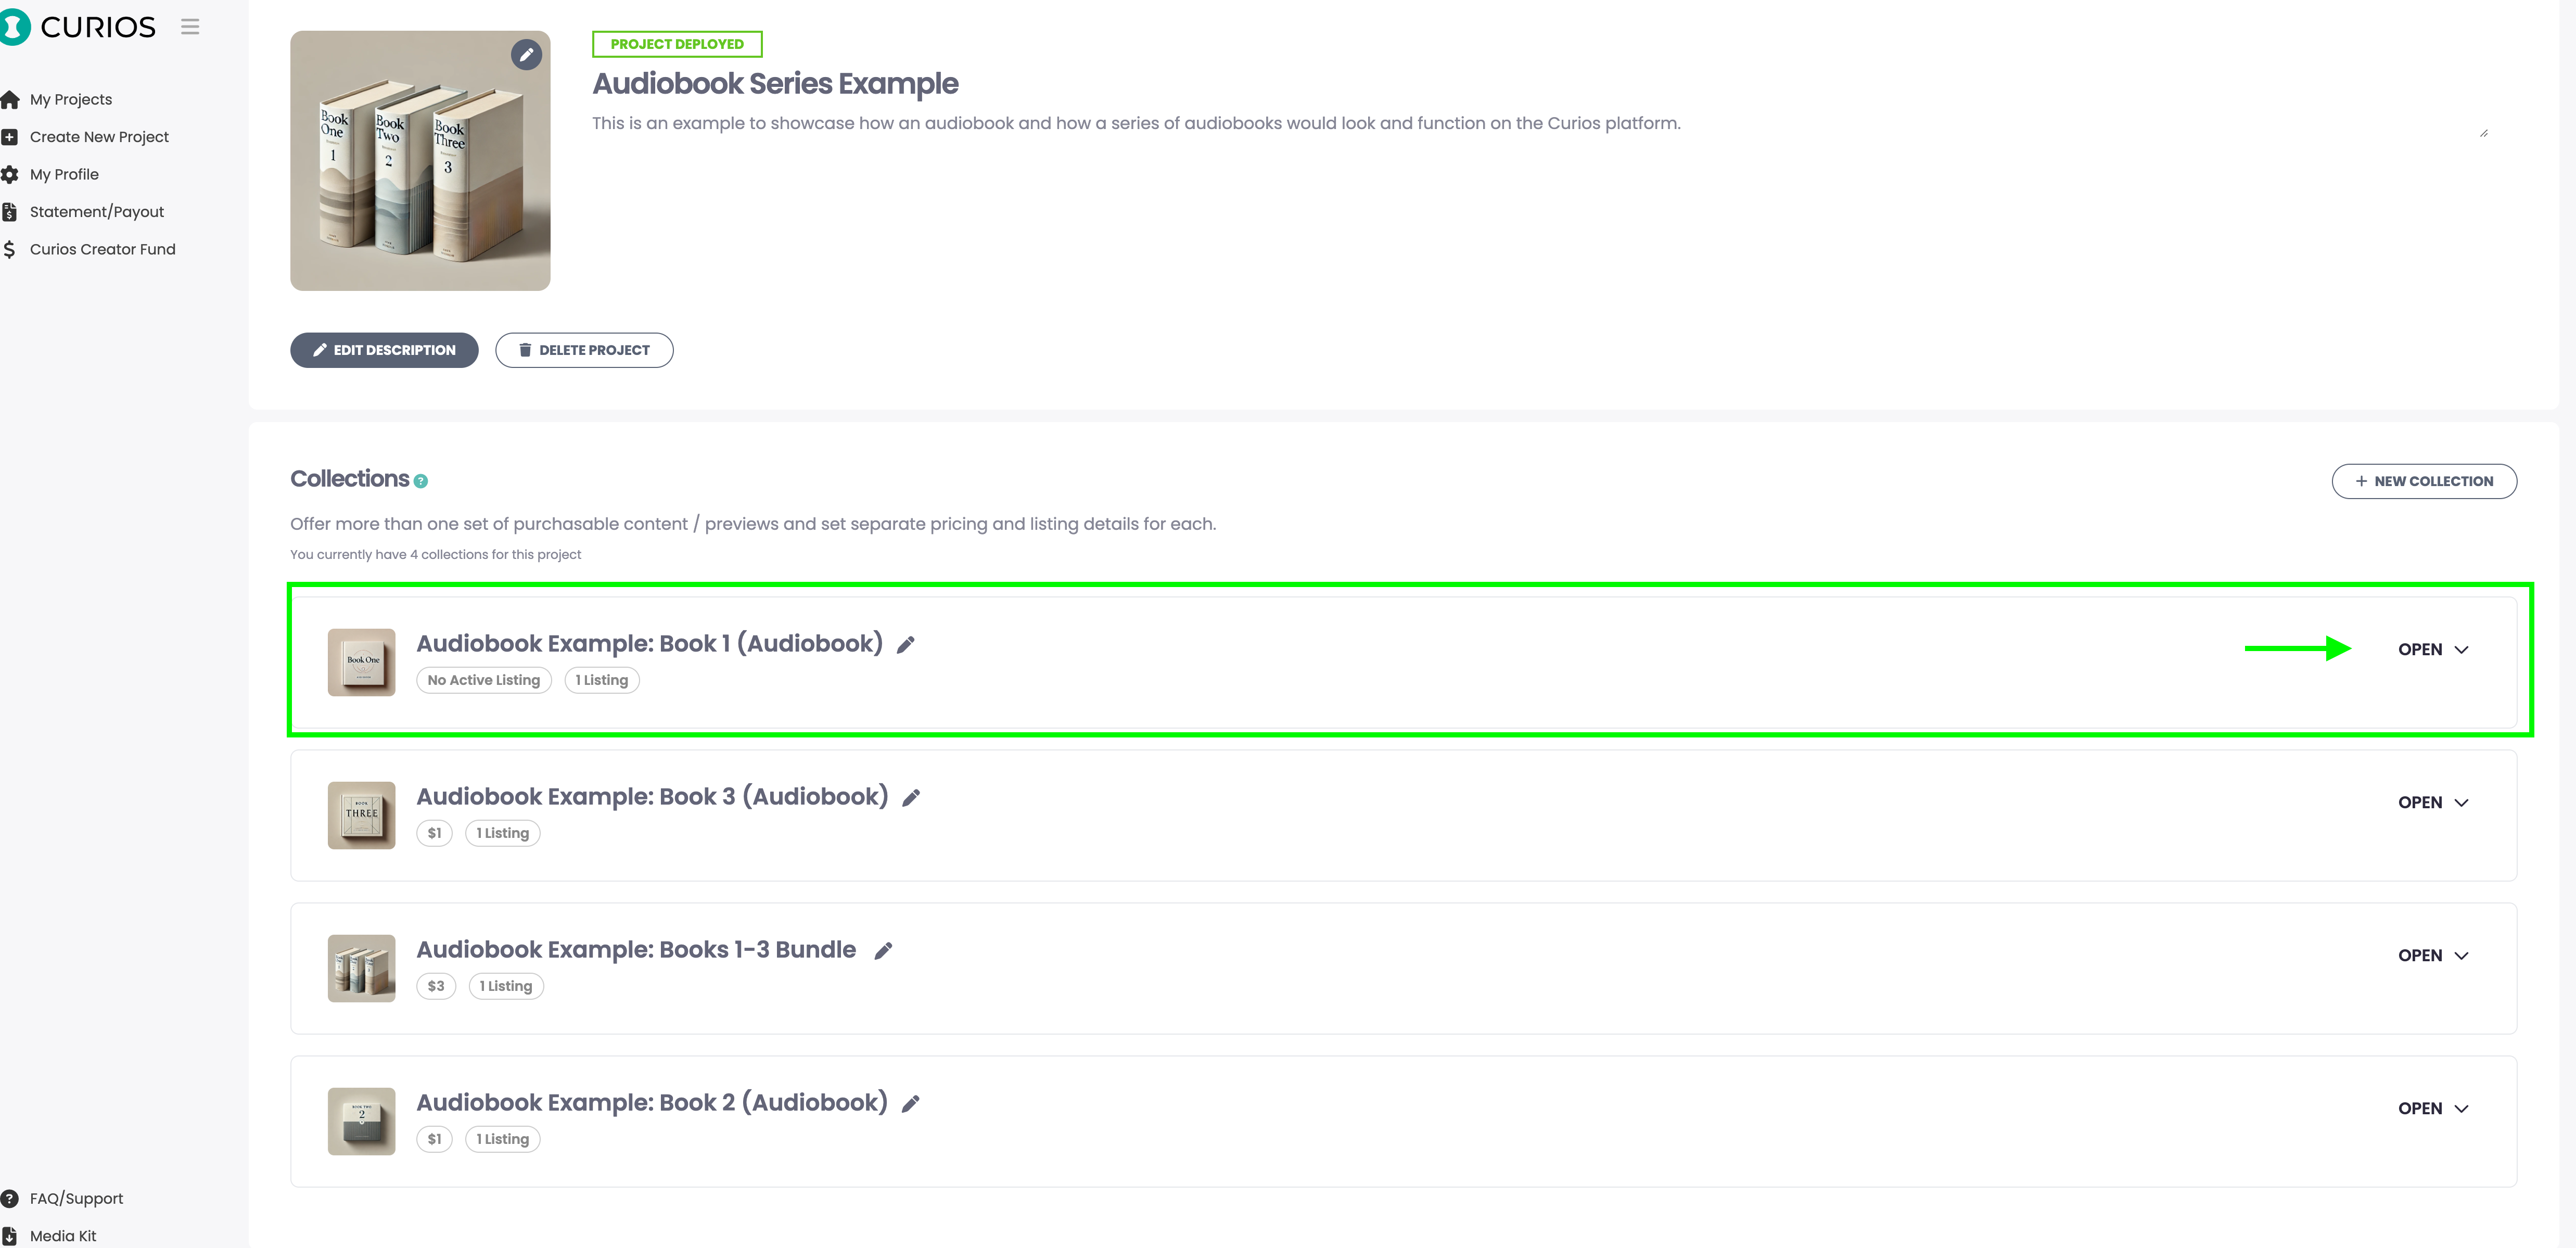
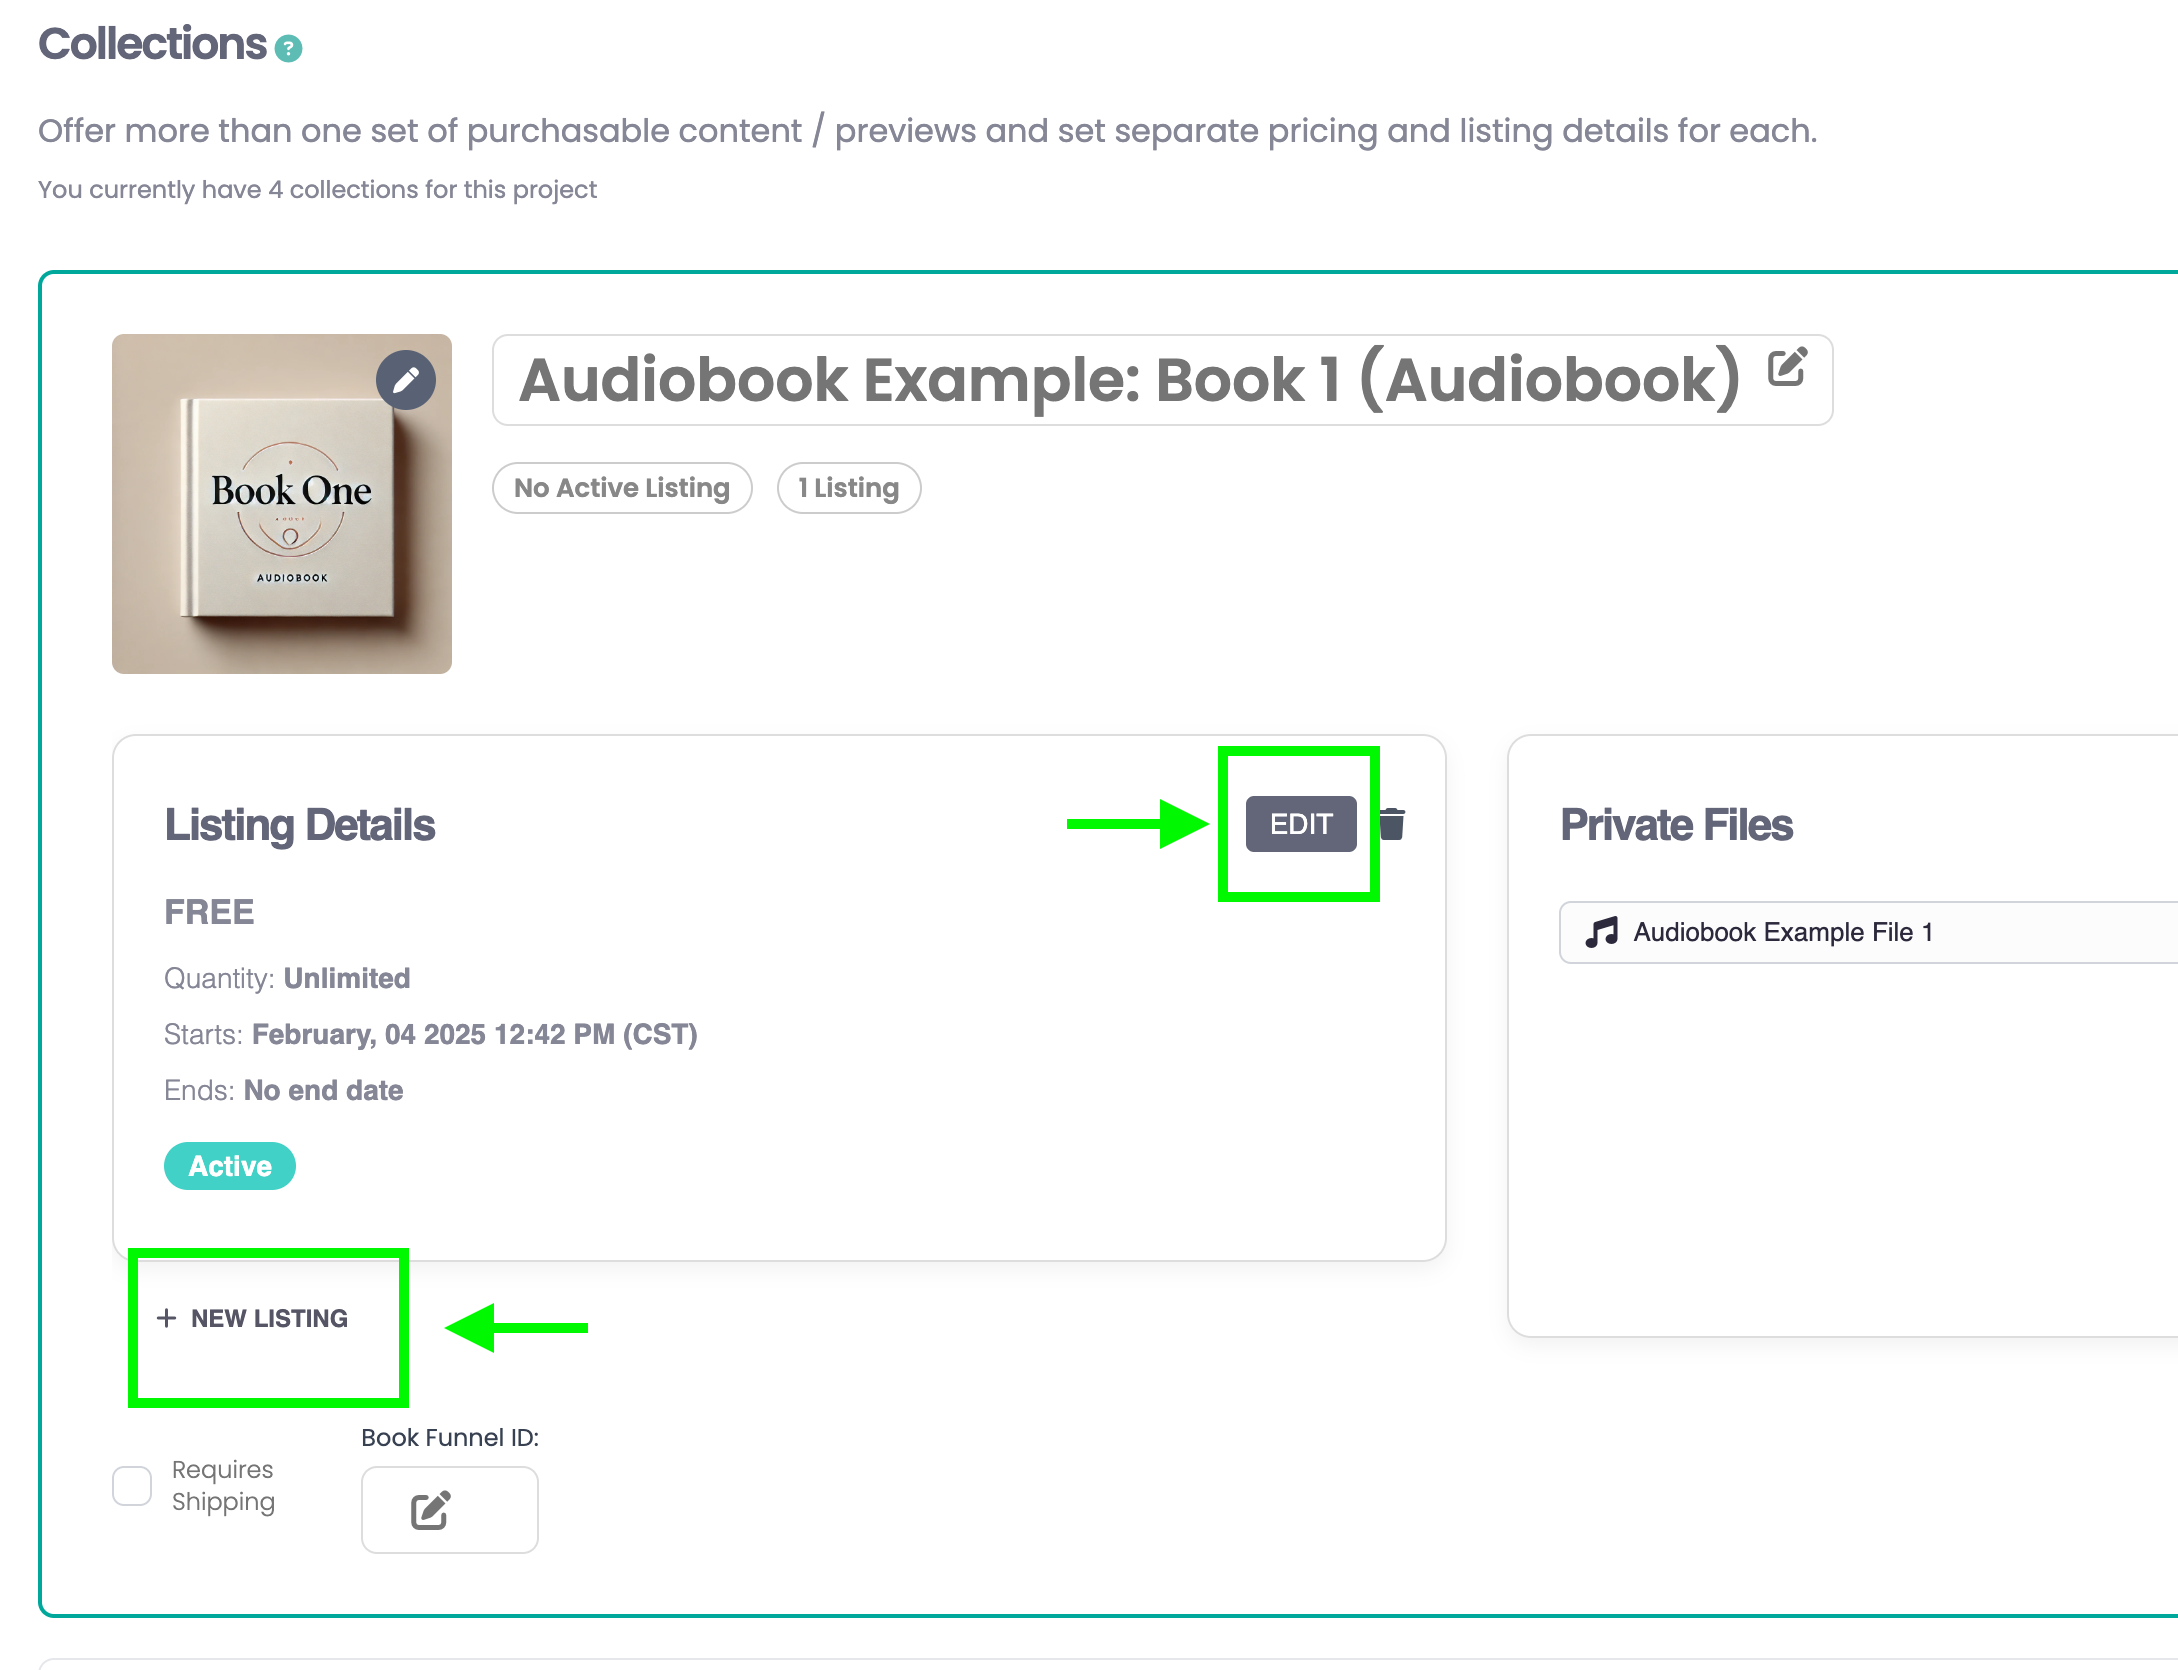
Ok, let's navigate to the "Listing Details" area of your item and we're ready to get started.
Step 1: Setting the base pricing
Here we're going to make sure our book is at the default pricing we want. If you already set this to the price you wanted (when not on sale) when you created this item, then you don't need to do anything in this step. In this example, our item was set to FREE initially, so we're going to change so it will be $10 up until the sale starts.
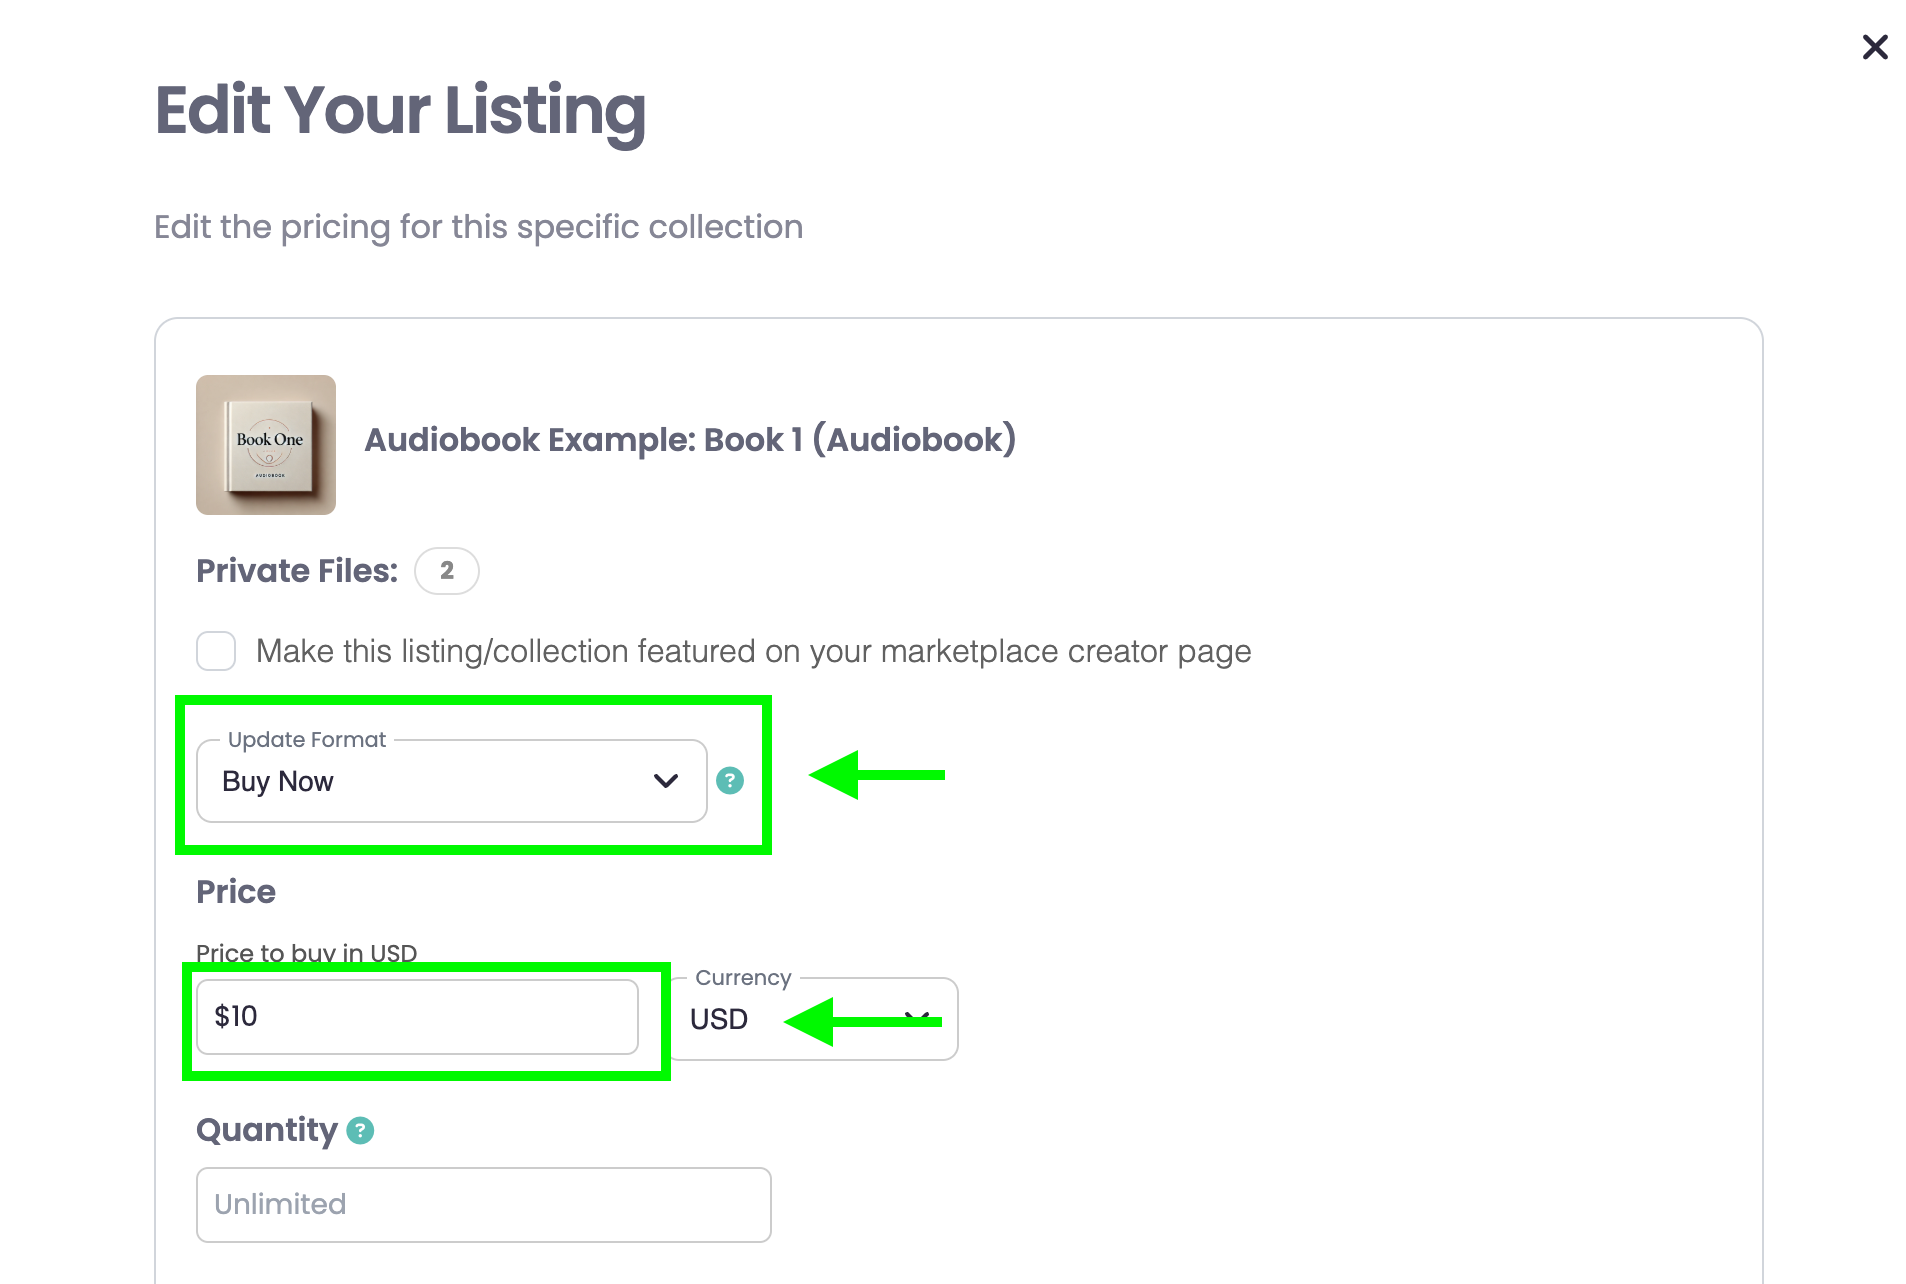
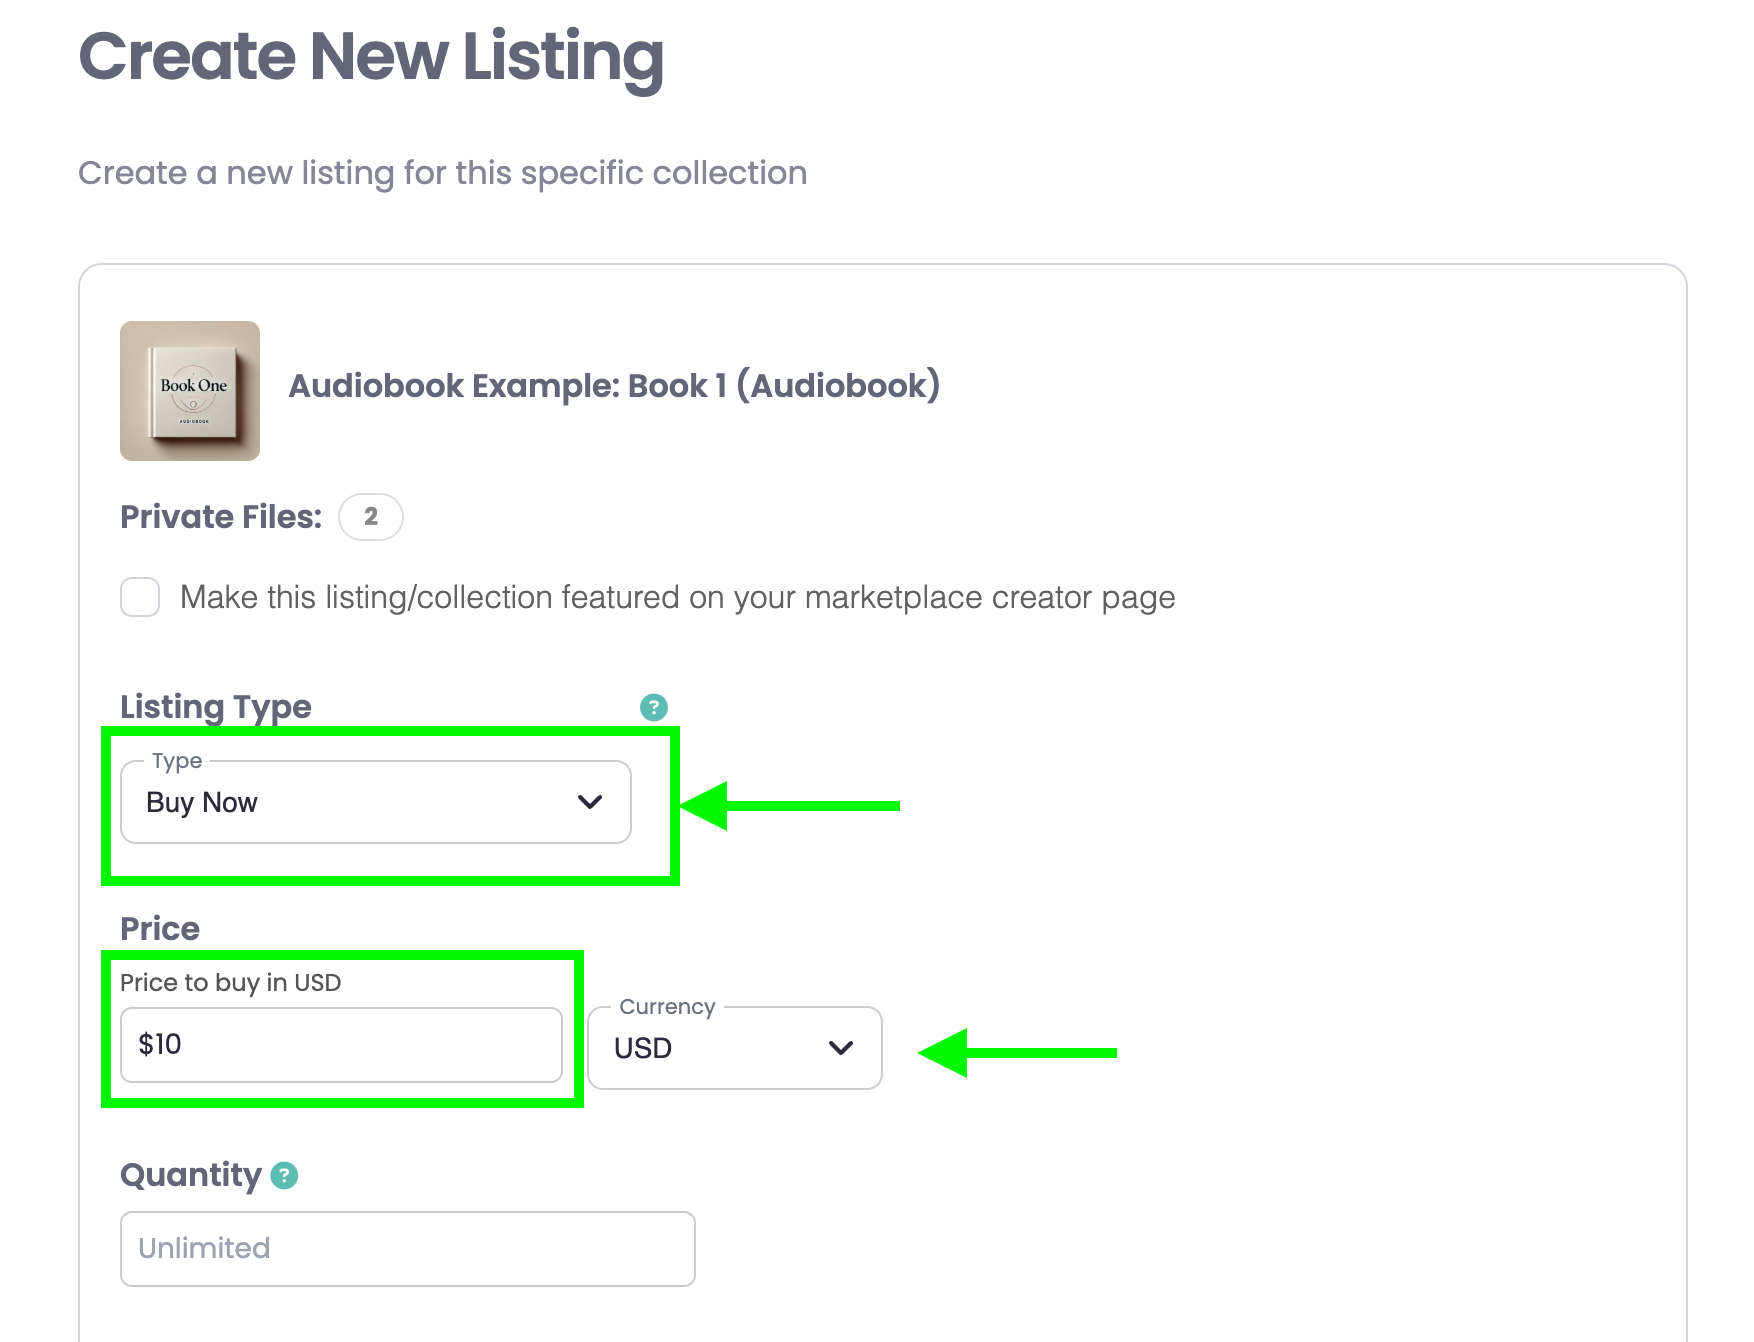
- Click "Edit" in the "Listing Details" area to open the "Edit Listings" tools
- We will set the dropdown to "Buy Now" and set the price for $10.
We will set an end date for this $10 price at the moment that we want this pricing to end for our upcoming Valentine's Day sale.
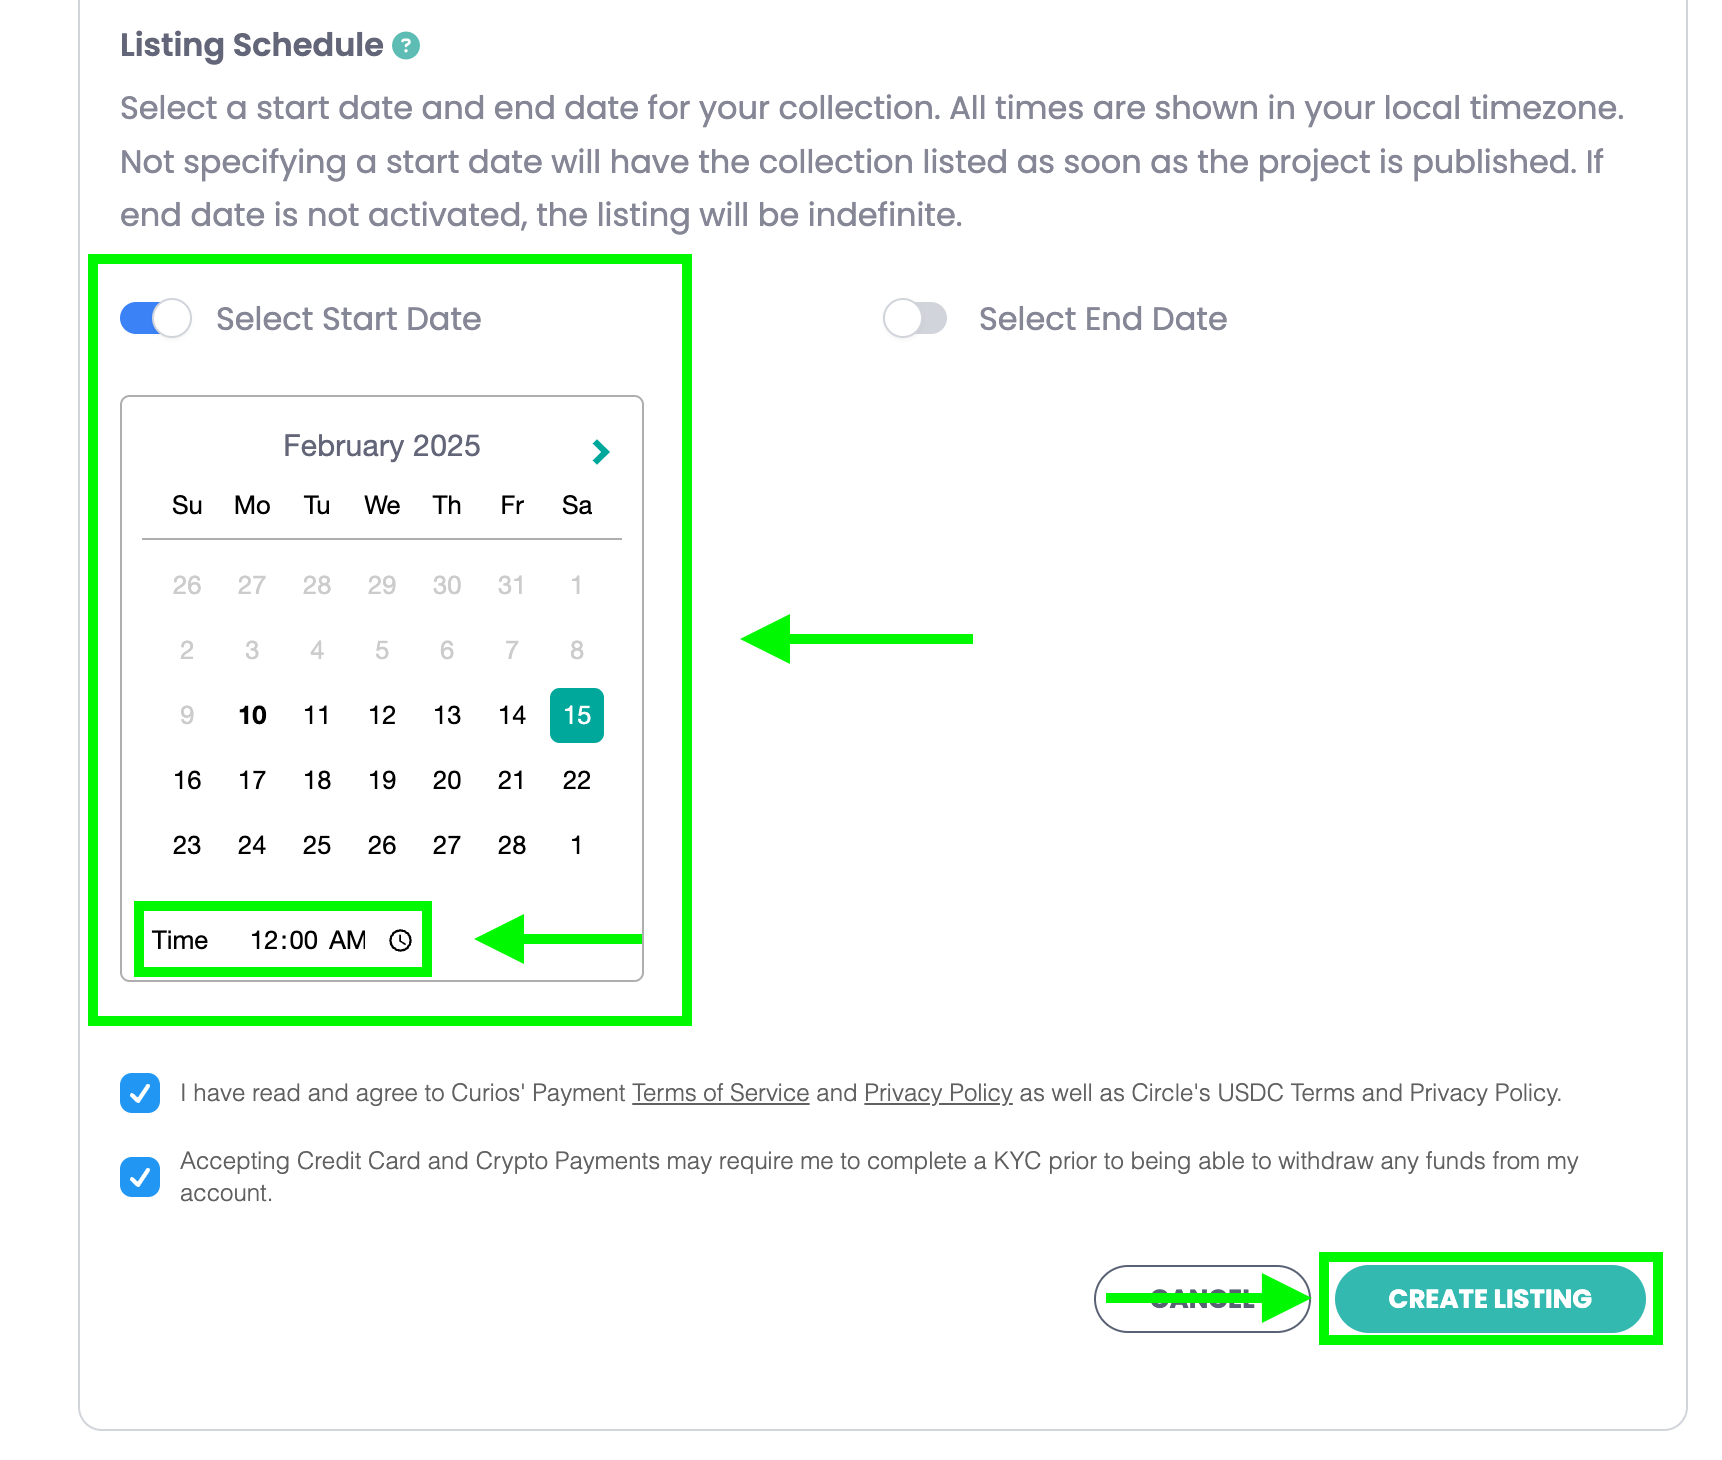
- Toggle on the "Activate/Edit End Date"
- Choose the Date you want this pricing to end (in our case Valentines Day)
- Set the Time you want this pricing to end (all times are in your local time zone)
- Hit "Save Changes"
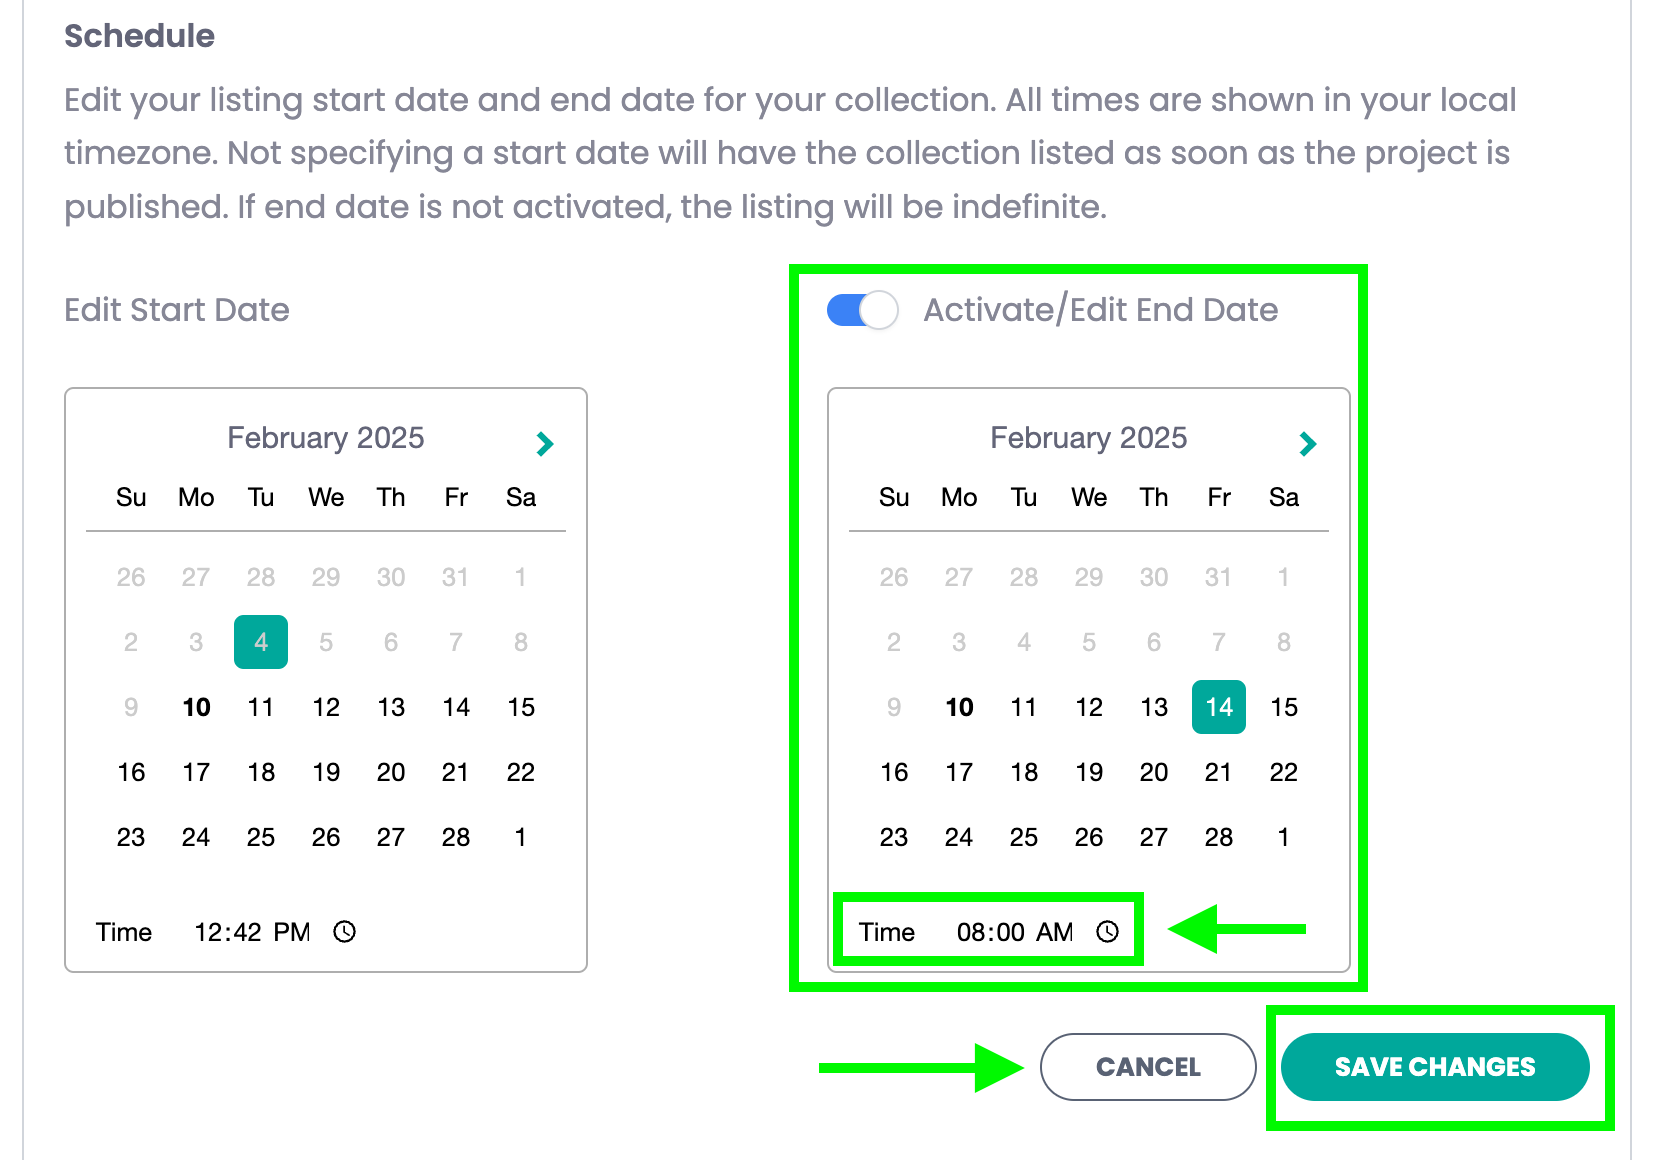
Note: We use date/time to tell the marketplace what price an item should be. In order to program a price change, you will need to set an end date.
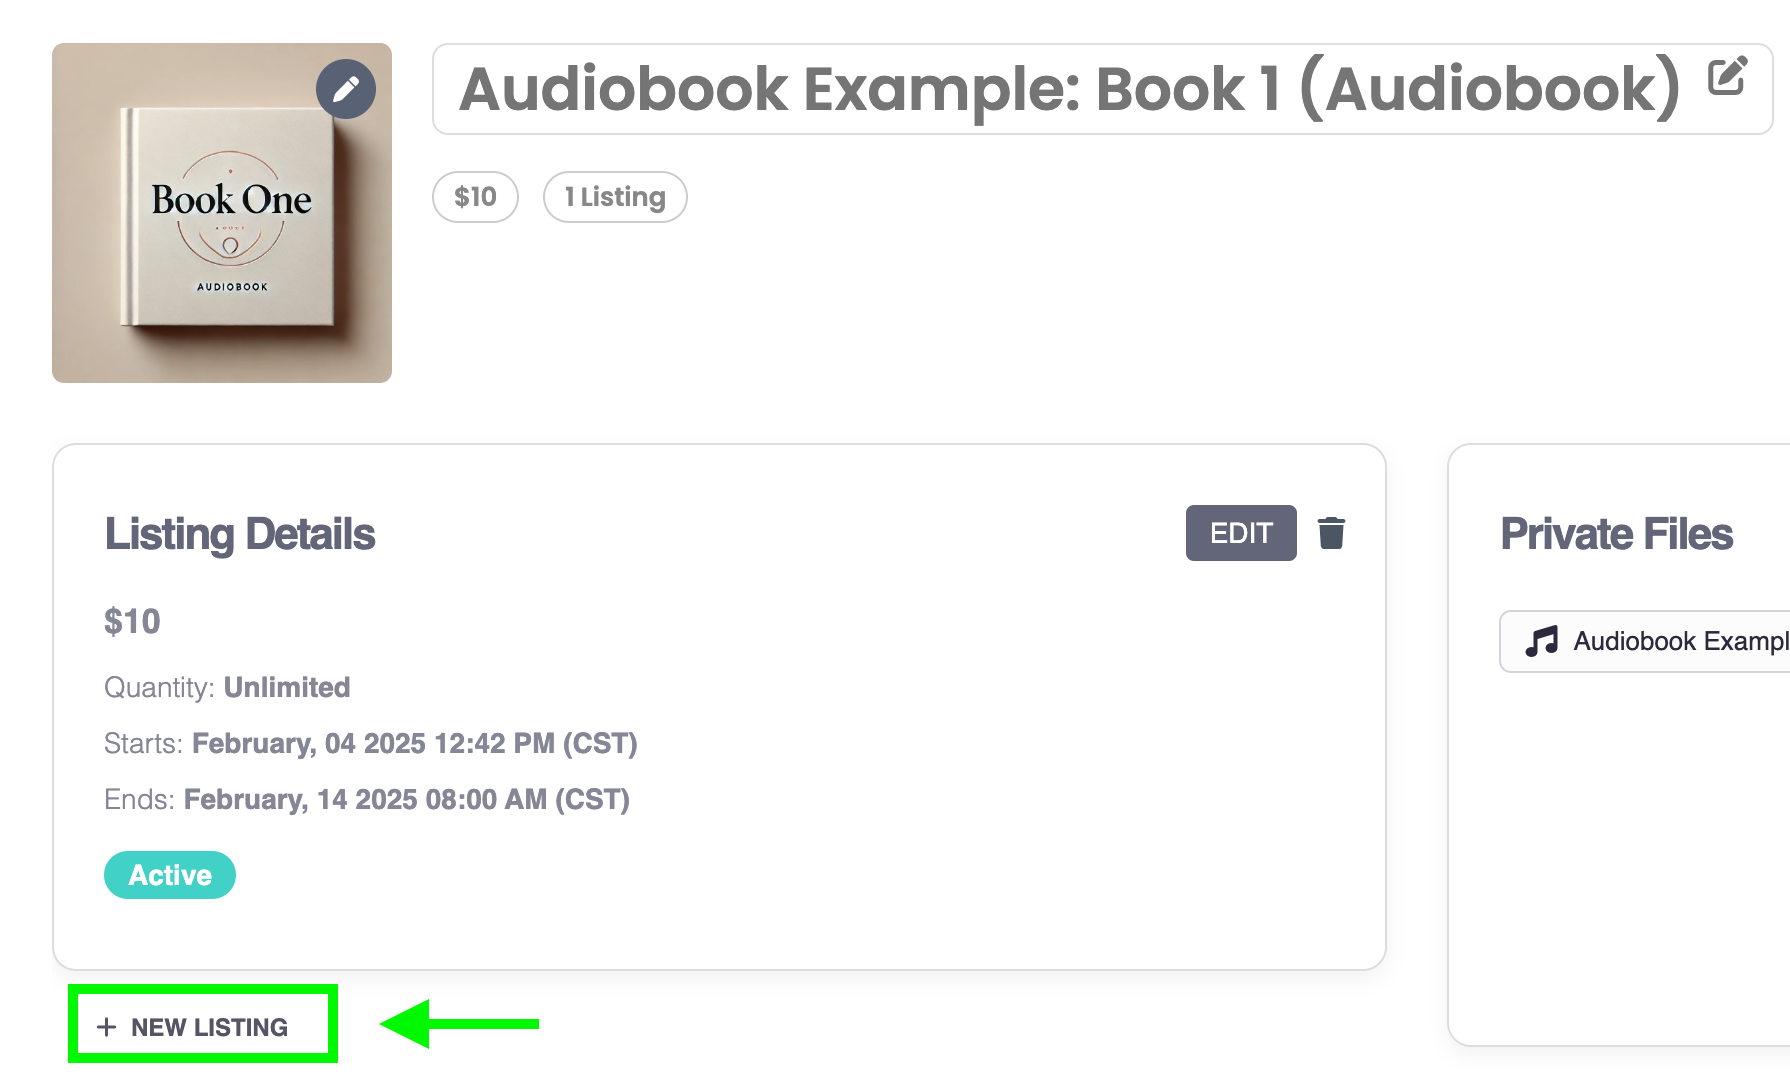
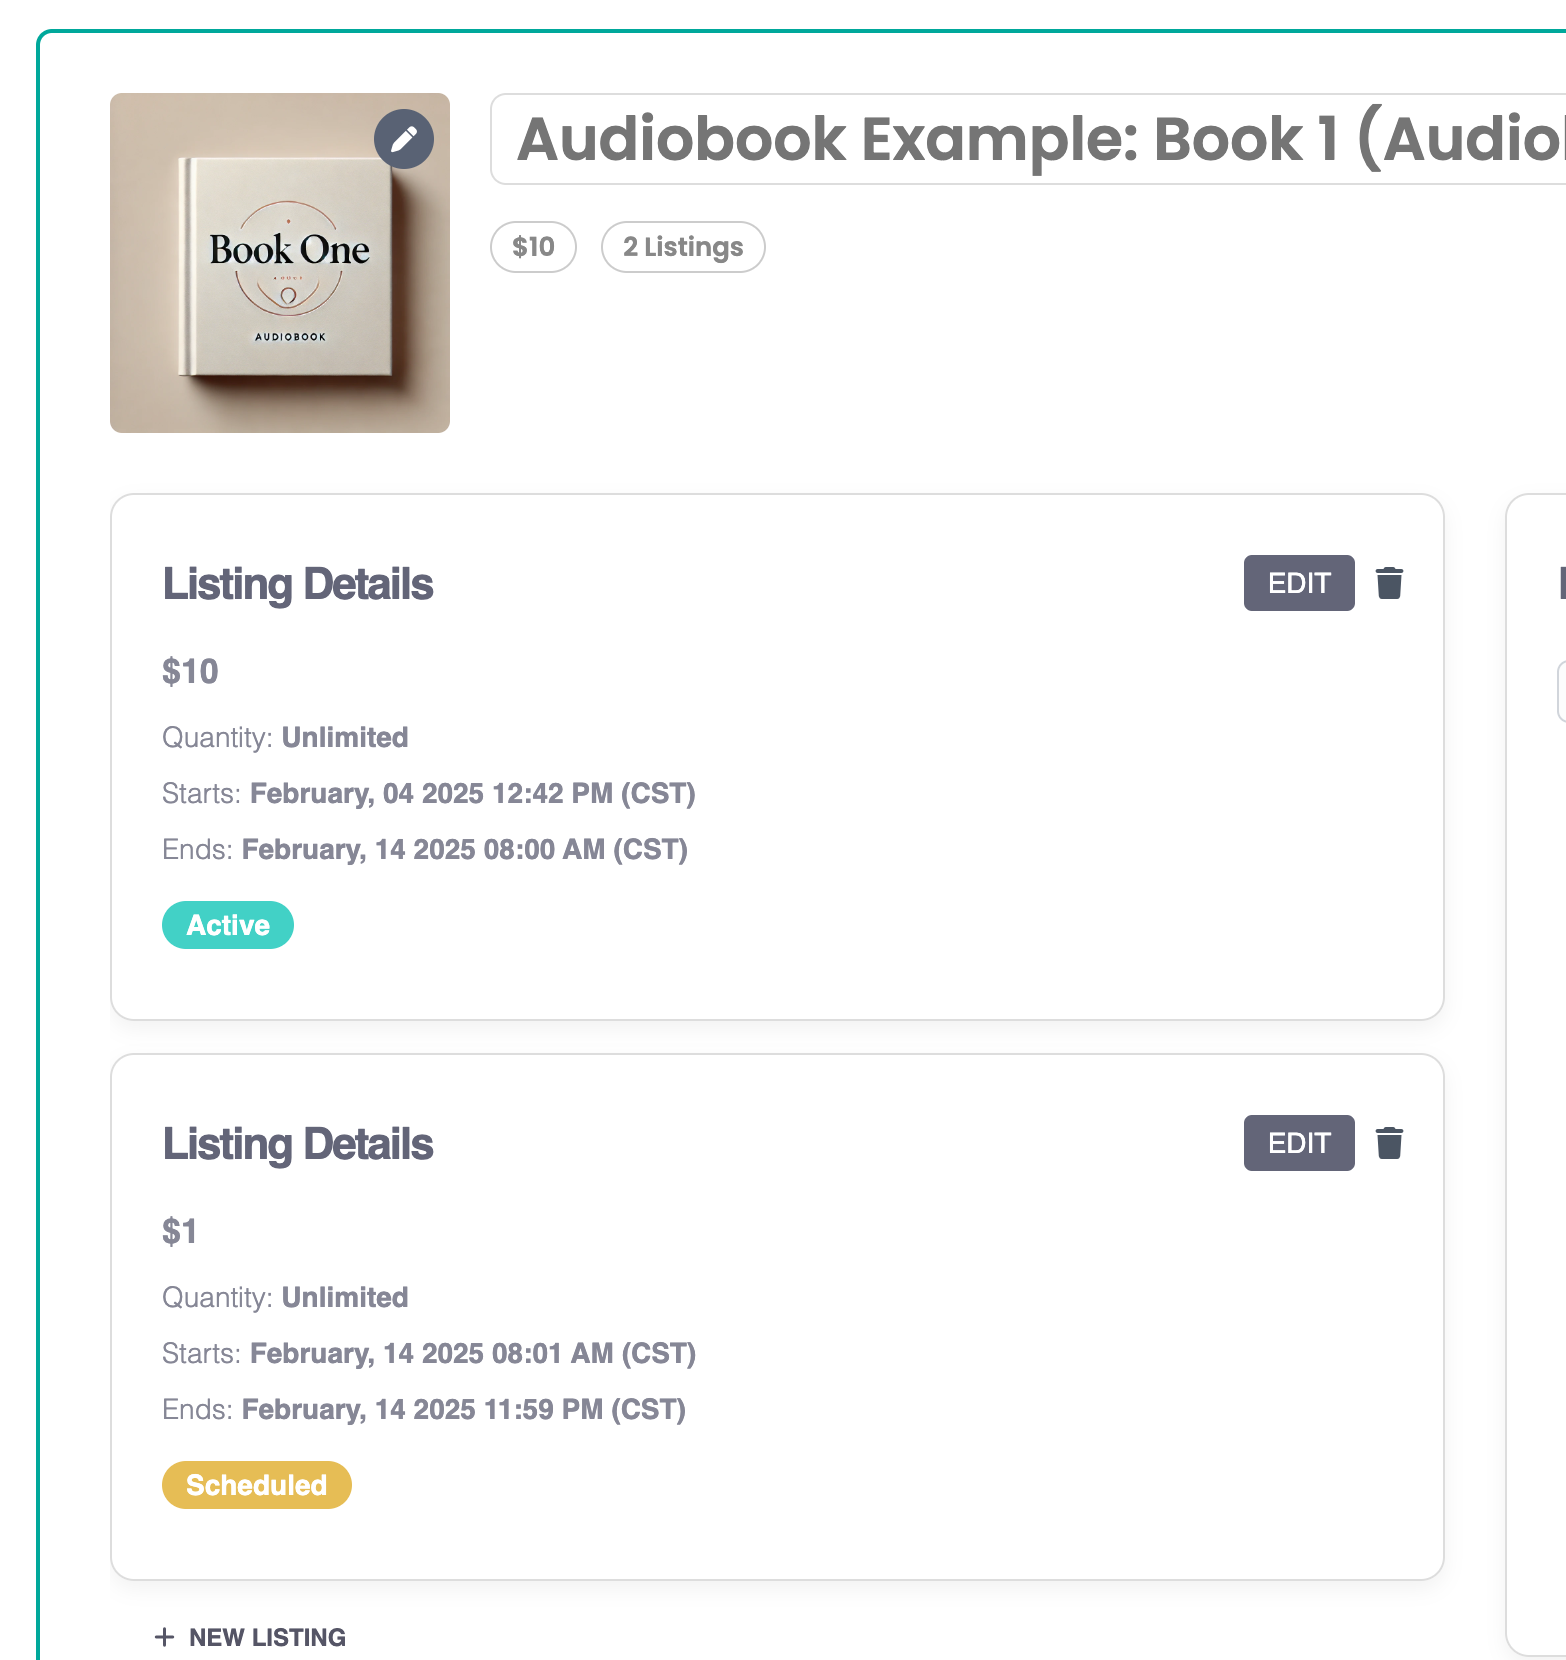
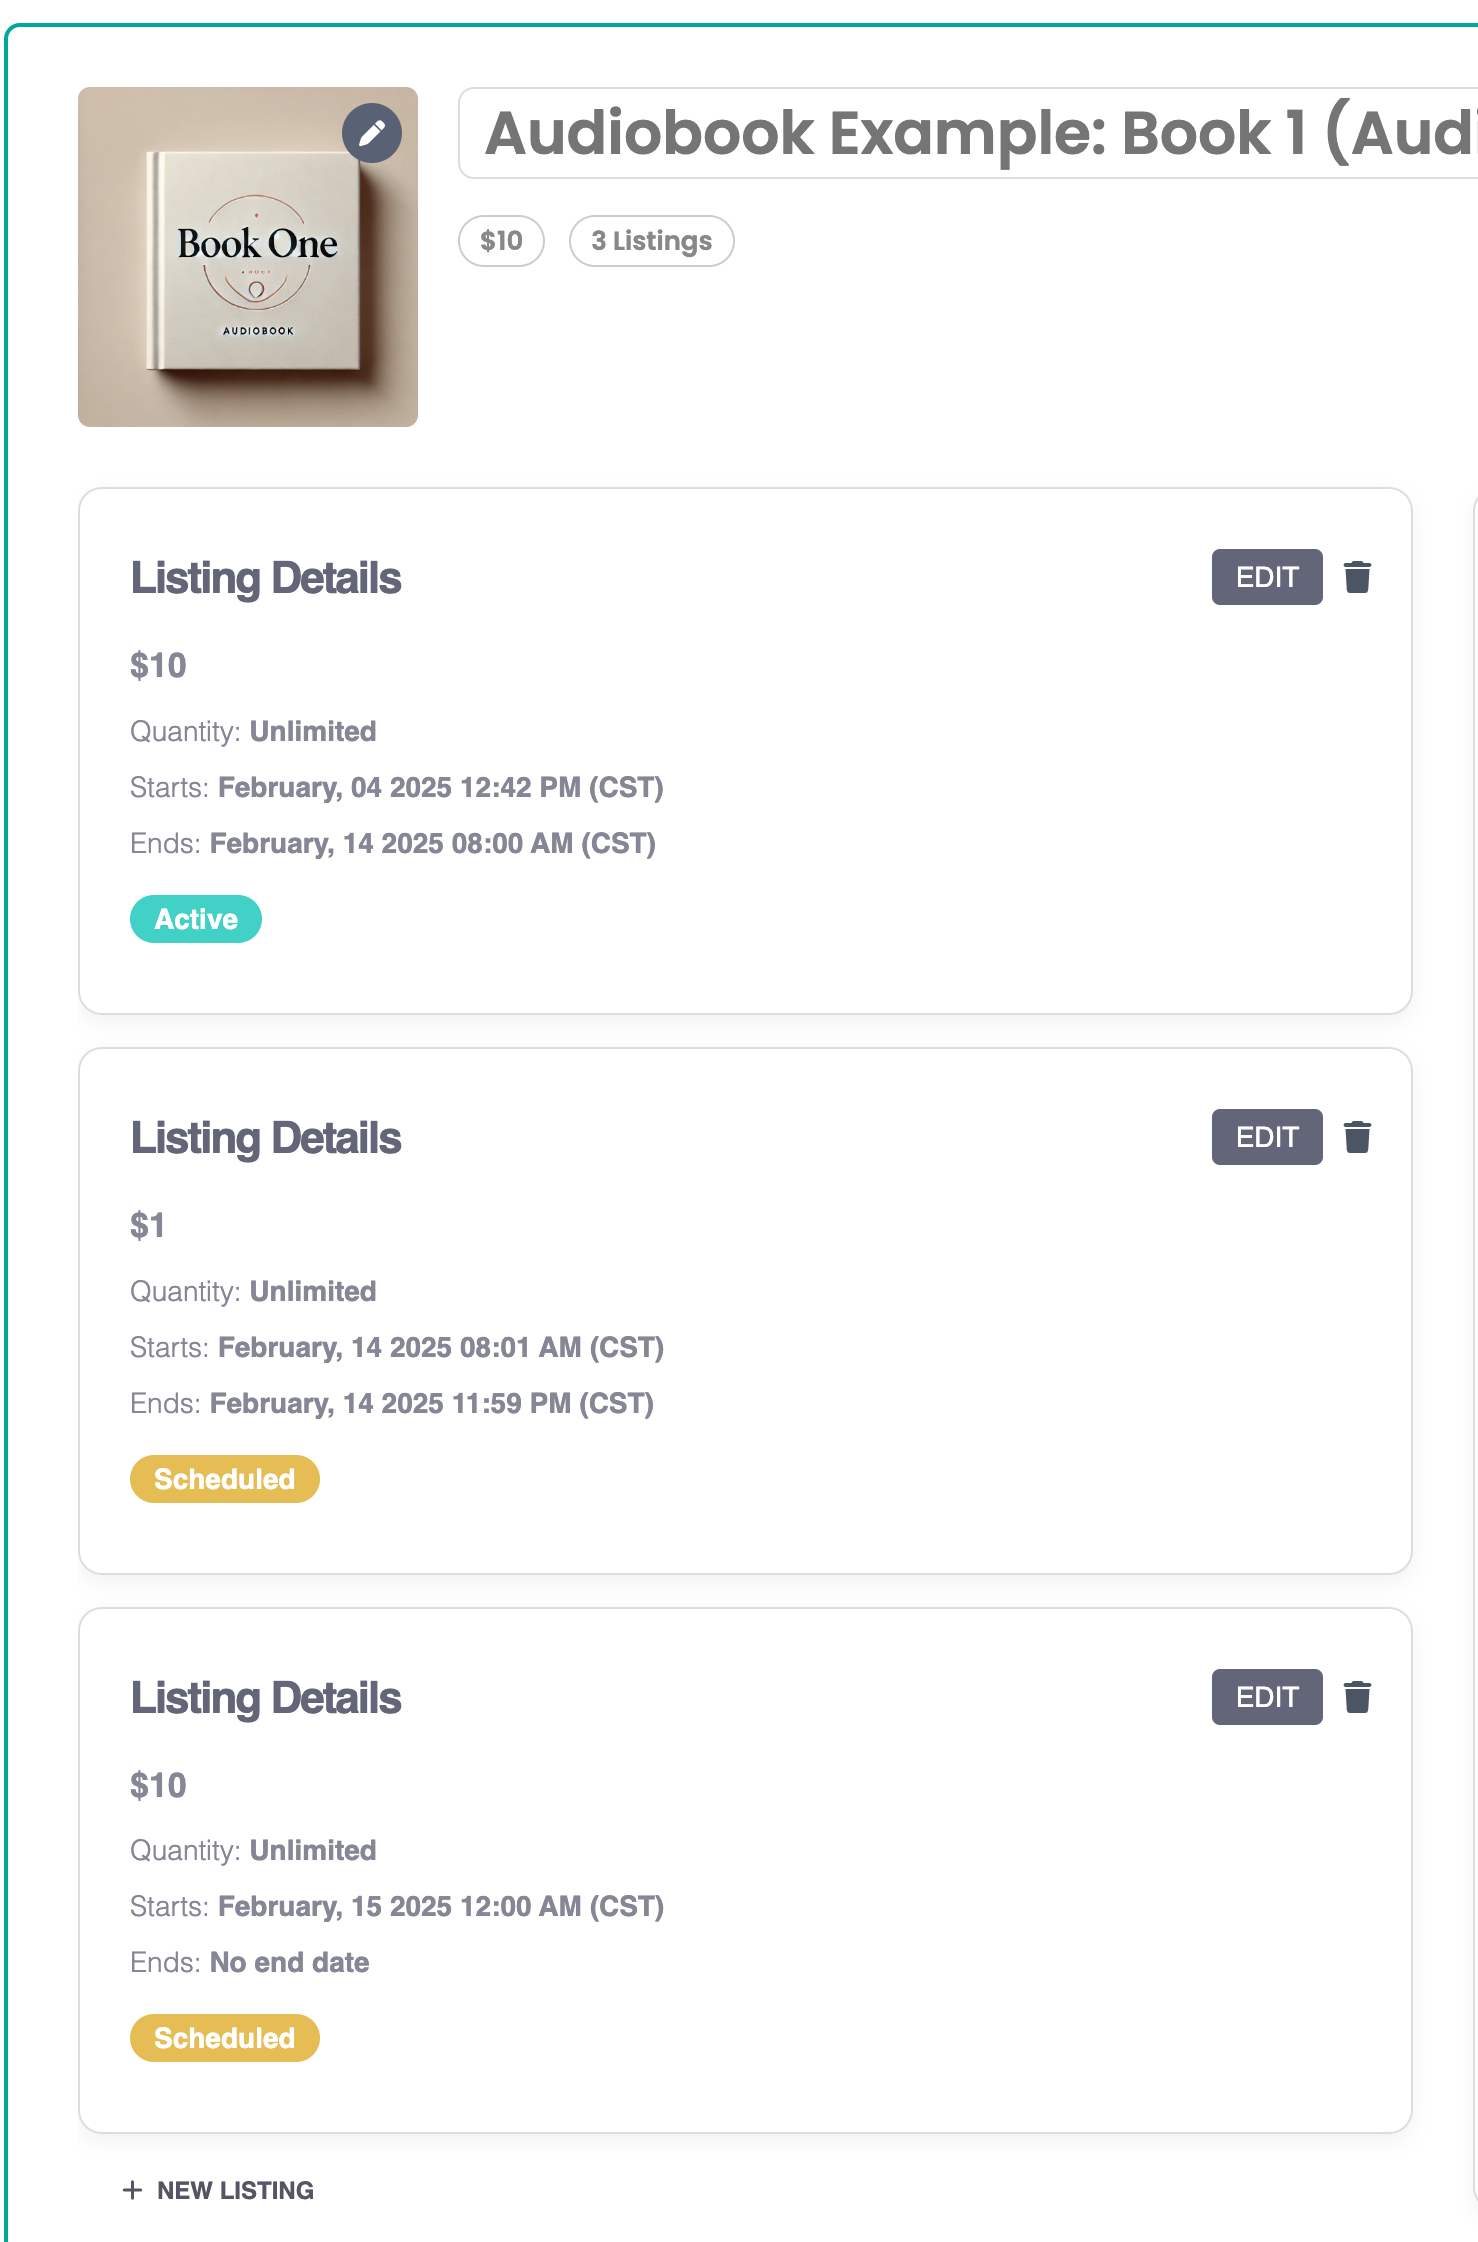
You should see your current pricing detailed in your item summary.
Step 2: Scheduling the sale pricing
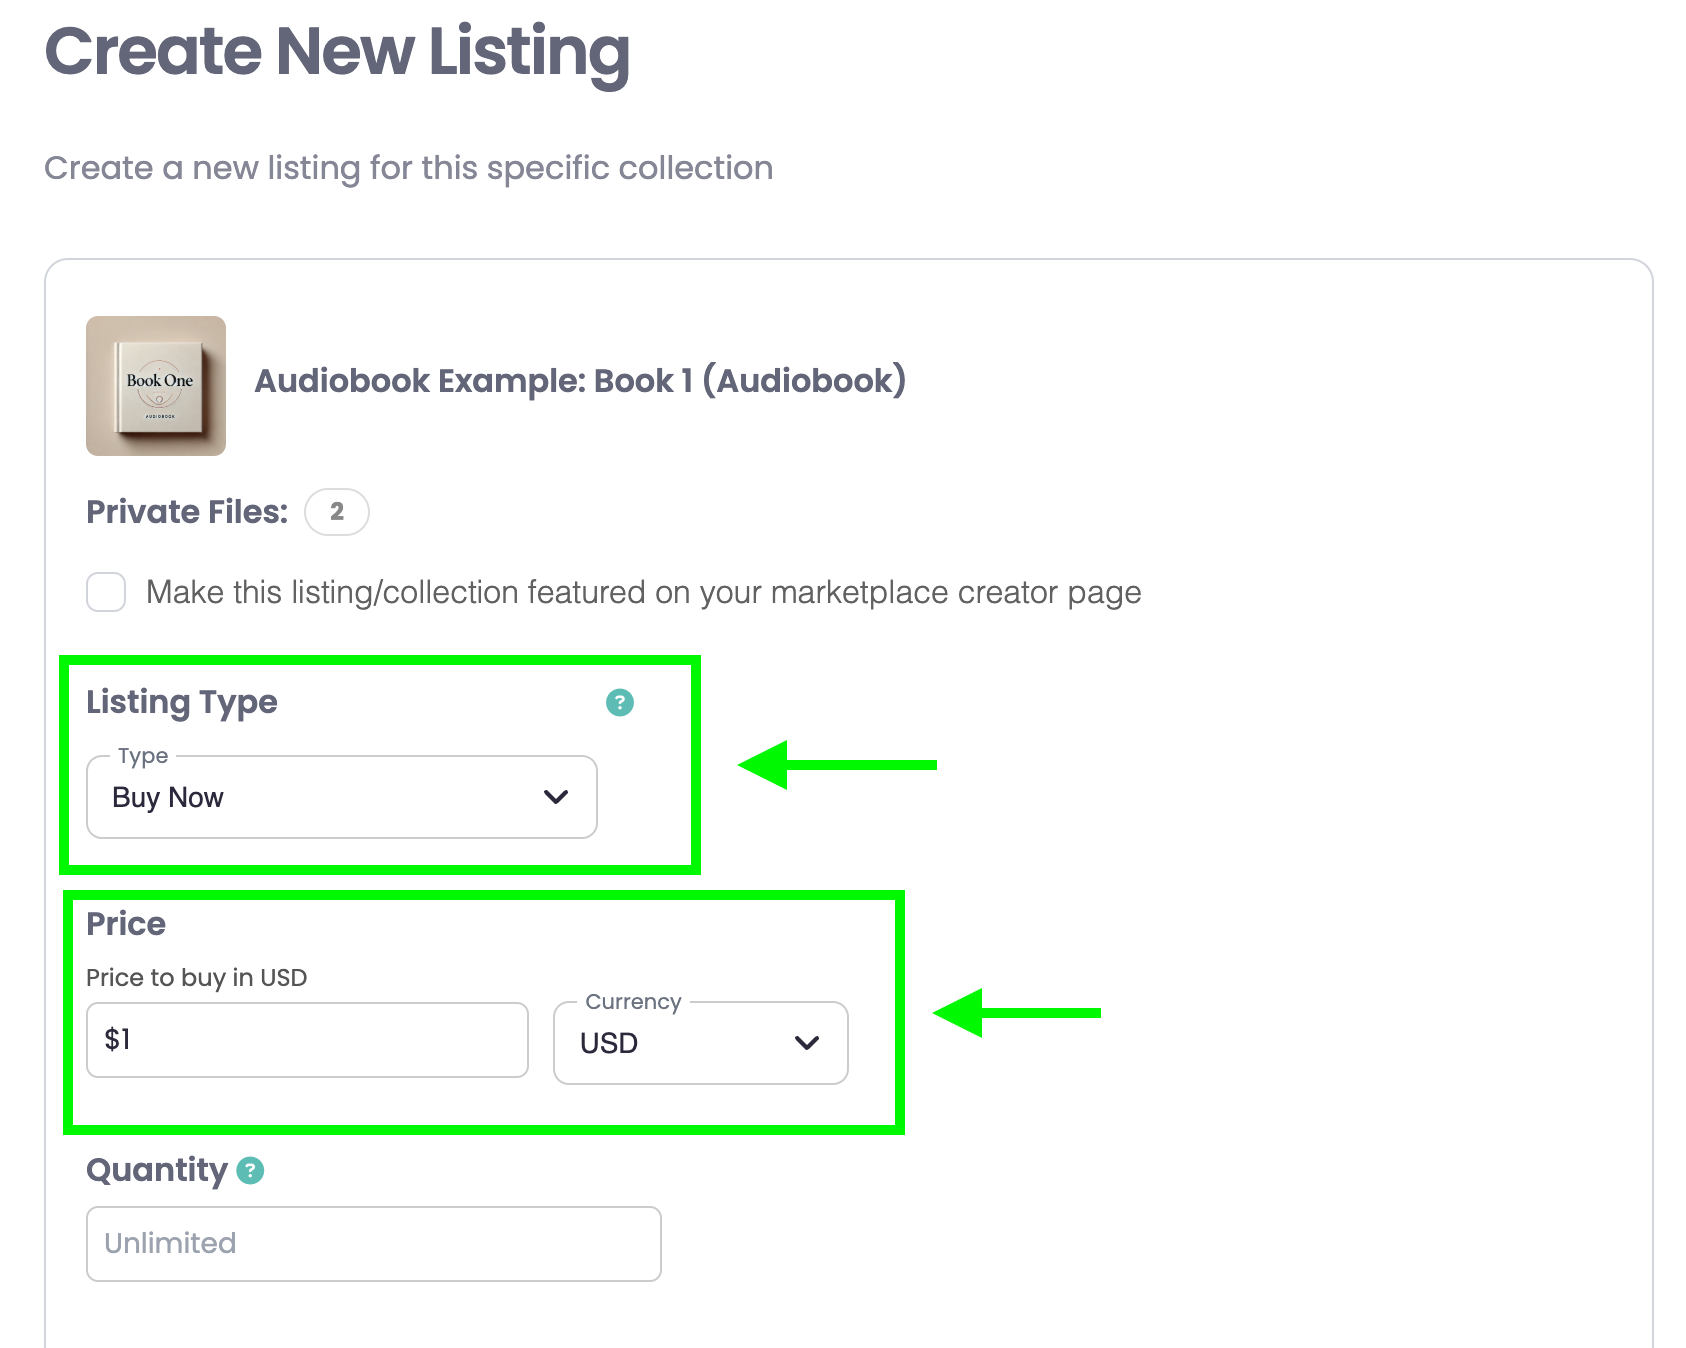
- Next click "+ New Listing"
- Set our sale price of $1 by selecting "Buy Now" from the "Listing Type" dropdown and editing the price to say $1.
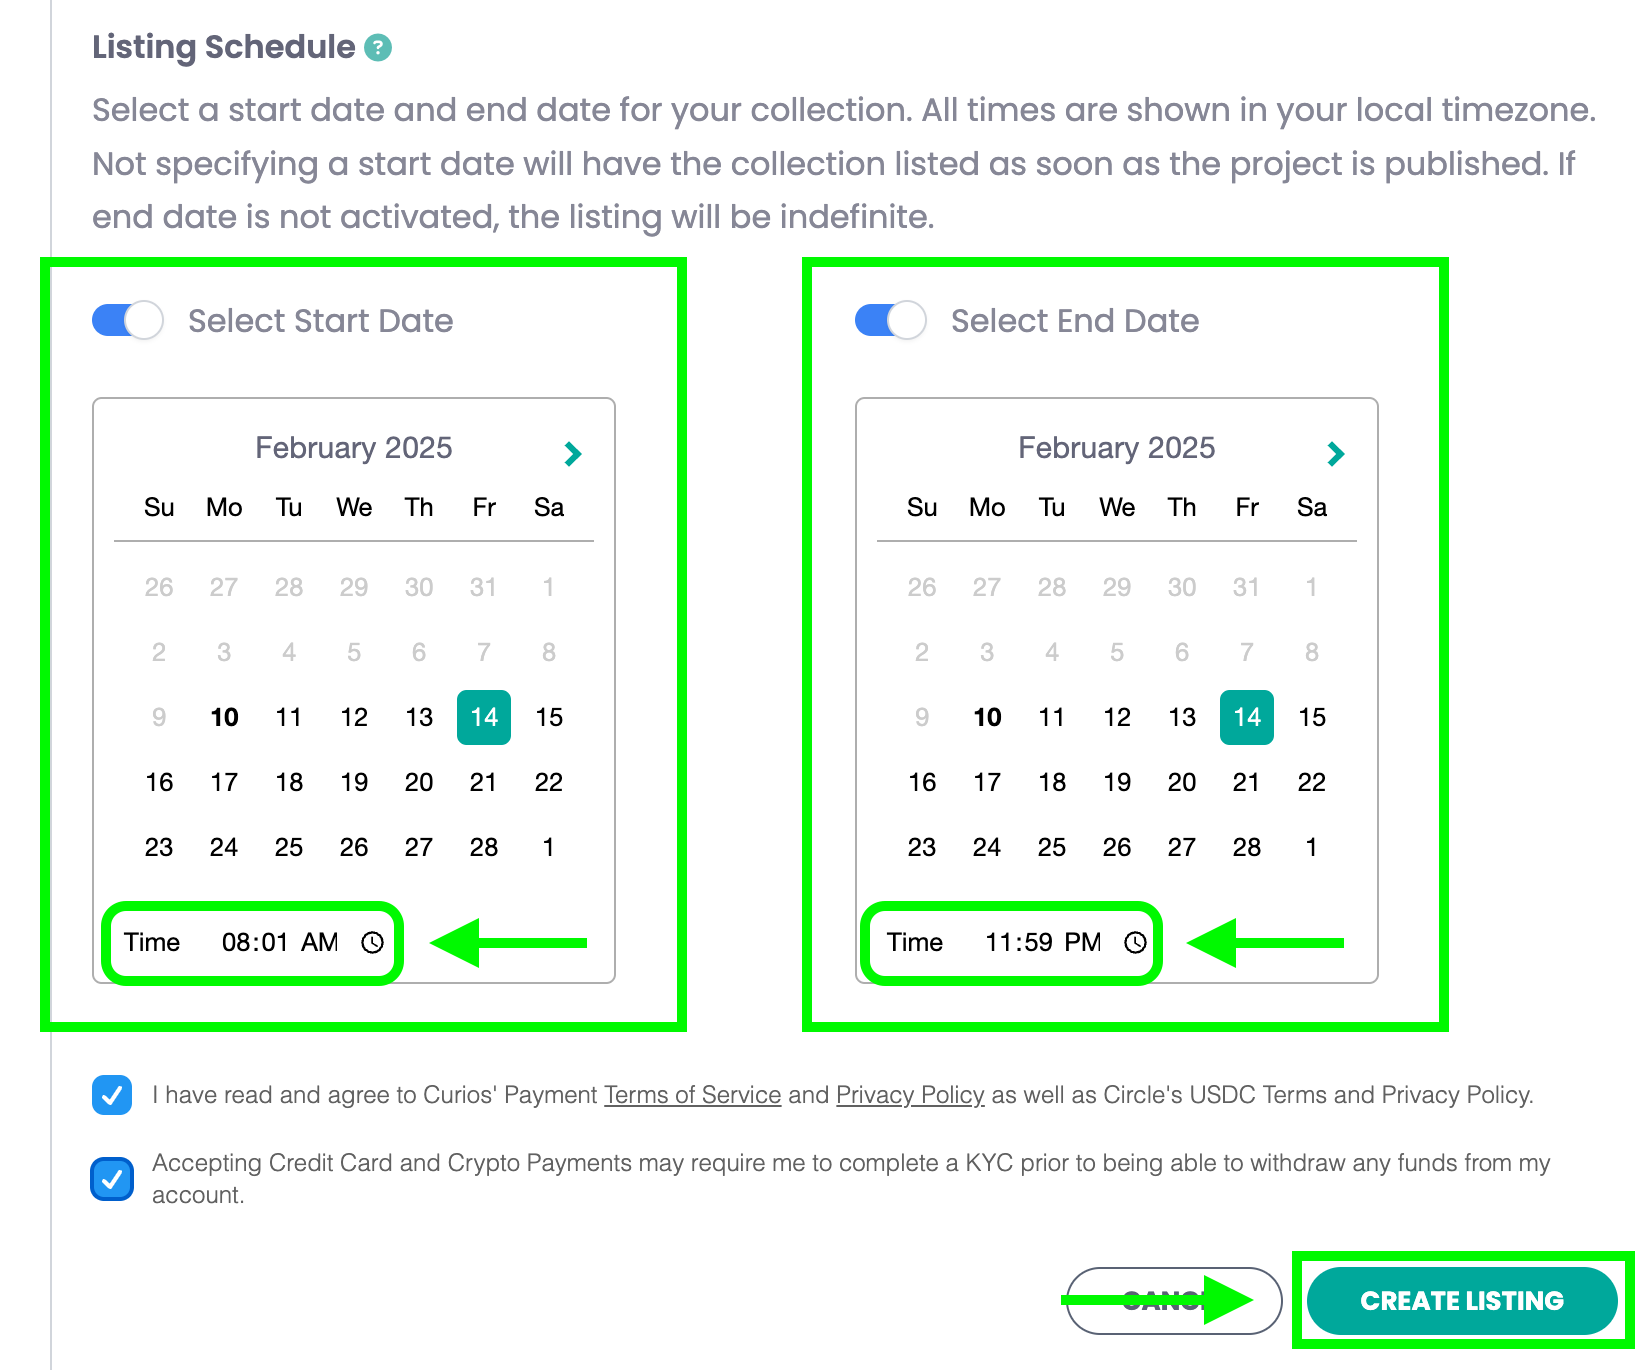
Now we need to set the start and End Date for our $1 sale price.
Note: You will need to remember your dates and times of your previous pricing so there are no date overlaps.
- Set the start date (Valentine's Day in our example)
- Set the start time, we set the end time previously at 8:00 AM, so our start time must be later than this. We are choosing 8:01 AM
- Set the End Date and Time - since we are running a 1 day sale in this example, we chose Valentine's Day as the end date and we set 11:59 PM as the end time.
- Accept Terms, and hit "Create Listing"
You should now see your sale price and date on the summary area for your item (image below):
Step 3: Scheduling the pricing to go back to your base pricing
- Hit "+ New Listing" Again
- Set our post sale price of $10
Now we need to set our post sale start date/time.
Note: In this case, since we want the $10 price to run in perpetuity after the sale, we will not set an end date.
- Toggle on "Select Start Date"
- Select Feb 15 with a time of 12:00 AM (midnight) - since our sale pricing ended at 11:59 PM on Feb 14, so this will need to start after that time.
- Accept terms and hit the "Create Listing" button
Review all the programmed in sale pricing and if any edits are needed you can edit this information at any time. As a reminder, all times are set in the local timezone you are in when you are logged into the studio.
That's it! You now know how to create sales for your items.